You can create an HTML-based email template for the Activity Entry Email that participants will use to approve a request. To create an HTML-based email templates for approval, do the following.
Prerequisites
- HTML-based approval templates work only with mobile or web-based email. This functionality does not work with the Outlook client application for Windows.
- Some mobile devices do not allow you to edit text in the replies. For more information, see Email Approval on Mobile Devices
Navigation
- In AgilePoint Envision, open a process template.
- Drag any AgileWork, and drop it on the Process Model.
- To view the entire list of properties, in the Design Tasks pane, click Show Properties.
- In one of the following fields, click Add Mail Template.
The specific fields that display vary, depending upon the AgileShape
you are using:
- Activity Entry Message (Email)
- Reminder Message (Email)
- Task Completed Message (Email)
- Task Reassigned Message (Email)
- On the Email Template Wizard, do one of the following:
- To modify an existing email template, in the Name list, select the name of the template you want to modify.
- To create a new email template:
- Click New.
- On the New Name window, enter the name you want to identify your email template.
- Click OK.
Instructions
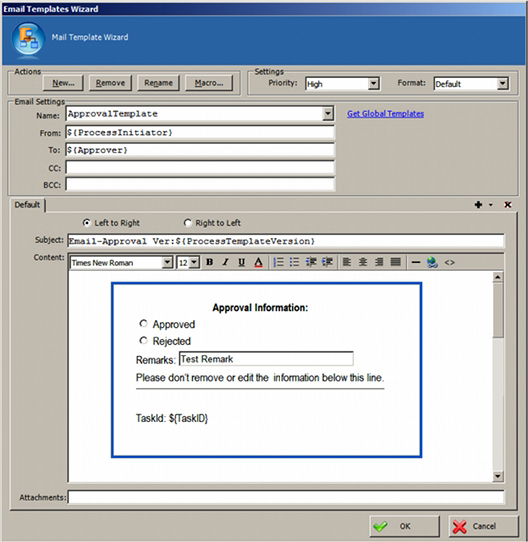
- In the Email Templates Wizard, click the HTML code button (< >).
- In the email body, paste the following HTML code.
<!DOCTYPE HTML PUBLIC "-//W3C//DTD HTML 4.0 Transitional//EN"> <HTML><HEAD><TITLE></TITLE> <META http-equiv=Content-Type content="text/html; charset=utf-8"> <META content="MSHTML 6.00.6001.18319" name=GENERATOR> </META></HEAD> <BODY bgColor=#ffffff> <STYLE type=text/css> <!-- p.one {border-left-color:#397dd0; border-bottom-color:#397dd0; margin-left:50px; width:500px; border-top-style:solid; border-top-color:#397dd0; border-right-style:solid; border-left-style:solid; height:225px; border-right-color:#397dd0; border-bottom-style:solid} --> </STYLE> <P class=one style="WIDTH: 444px; HEIGHT: 257px"><BR> <TABLE name="ApprovalInfo"> <COLGROUP width=25></COLGROUP> <TBODY> <TR> <TD></TD> <TH><SPAN style="FONT-FAMILY: Arial Narrow"> Approval Information:</SPAN></TH></TR> <TR> <TD></TD> <TD><SPAN style="FONT-FAMILY: Arial Narrow"> <INPUT type=radio name={/pd:myFields/pd:Approved}> Approved</INPUT> </SPAN></TD></TR> <TR> <TD></TD> <TD><SPAN style="FONT-FAMILY: Arial Narrow"> <INPUT type=radio name={/pd:myFields/pd:Approved}> Rejected</SPAN></TD></TR> <TR> <TD></TD> <TD><SPAN style="FONT-FAMILY: Arial Narrow">Remarks: </SPAN><INPUT style="WIDTH: 250px" size=25 value="Test Remark" name={/pd:myFields/pd:Remarks}></TD></TR> <TR> <TD></TD> <TD><SPAN style="FONT-FAMILY: Arial Narrow">Please don't remove or edit the information below this line. </SPAN></TD></TR> <TR> <TD></TD> <TD><SPAN style="FONT-FAMILY: Arial Narrow"> <HR> </SPAN></TD></TR> <TR> <TD></TD> <TD><SPAN style="FONT-FAMILY: Arial Narrow"> TaskId: ${TaskID}</SPAN></TD> </TR> <TR></TR> <TR></TR> </TBODY> </TABLE></P></BODY></HTML> - Complete the fields on the Email Template Wizard as required.
