A custom macro is used to simplify the data entry task when constructing an email notification by using a single attribute name (or macro) to refer to a combination of process attributes. Custom macros are stored in the process attribute list with a "*" for easy identification and can be reused when constructing additional email notification templates in the future.
In the steps below, a macro has been created called AccountInfo that has been defined as:
${ActivityName}<br>${ActivityParticipantFullNames}
When *AccountInfo is selected from the process attribute list,
${ActivityName}<br>${ActivityParticipantFullNames}
is displayed. Follow the steps below to create and use this custom macro in an email template.
To create a custom macro:
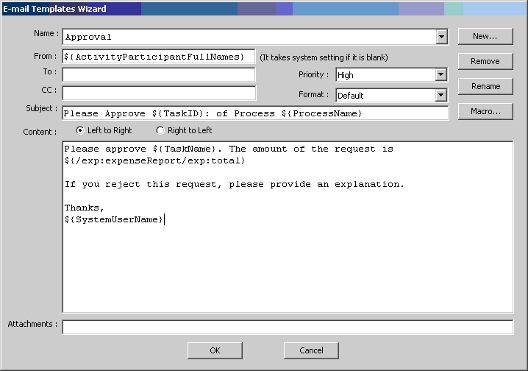
- From the E-mail Templates Wizard, click the Macro button.
The Custom Mail Template Macro window appears.
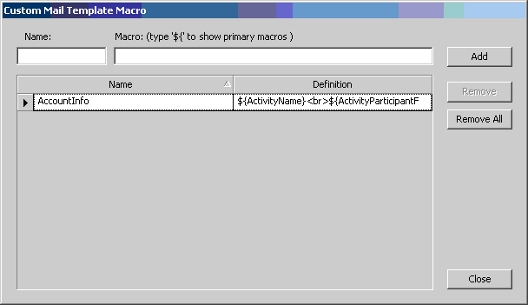
- Type a name for the macro in the "Name" text box.
- Define your custom macro in the "Macro" text box. You can use the list of process attributes to build your custom macro. In the window capture above, a custom macro called "Account Info" has been created so that when the AccountInfo macro is selected, the Activity Name and Activity Participant Full Name are inserted.
- Click the Add button. The custom macro is added to the list.
- Click the Close button to return to the E-mail Templates Wizard.
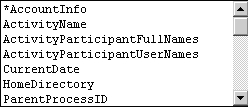
- When it is time to use the macro, type ${, the
custom macro that you have created will be
available in the list. Notice that the
macro has a "*" next to it to identify it
as a custom macro.
- To use this custom macro, in the body of the email
template, type ${ and select
*AccountInfo. The macro definition is
inserted as shown below.