The following menu options are available from the File menu in AgilePoint Envision.
File > New > Generic
This option allows the user to create a new process model based on the Generic process template.
File > New > Microsoft InfoPath
This option allows the user to create a new process model based on the Microsoft InfoPath process template.
After selecting this option, you will be asked to choose the InfoPath form that will be associated with the process model.
File > New > Microsoft SPDoc
This option allows the user to create a new process model based on the Microsoft SharePoint Document Library process template. After selection this option, you will be asked to choose the SharePoint Document Library that the process model will be associated with.
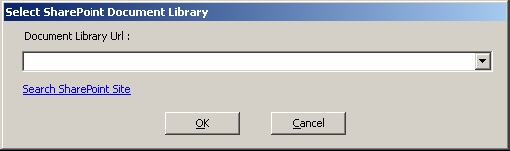
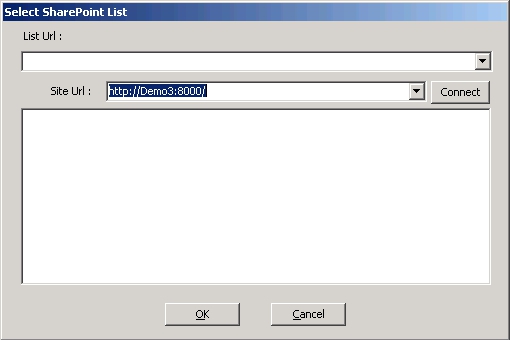
If you don't know the exact URL of the Document Library, you can click the Search SharePoint Site link to select the Document Library.
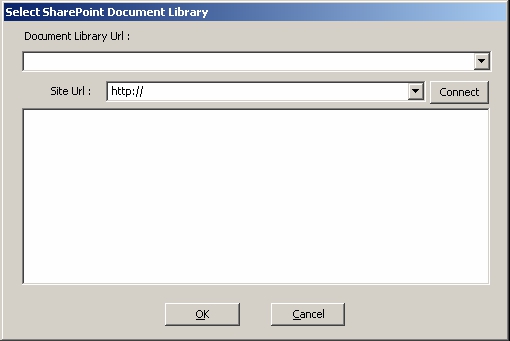
Type or select the SharePoint Site URL and click Connect. The directories available within that site appear.
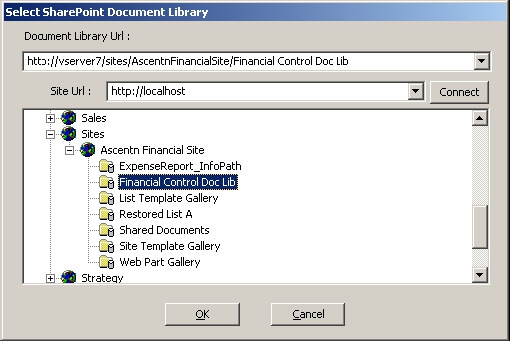
Click on the Document Library for which you would like to associate with the process model and click OK.
File > New > Microsoft SPList
This option allows the user to create a new process model based on the Microsoft SharePoint List template.
After selection this option, you will be asked to choose the SharePoint List that the process model will be associated with.
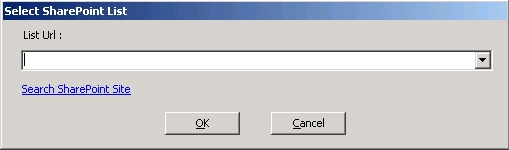
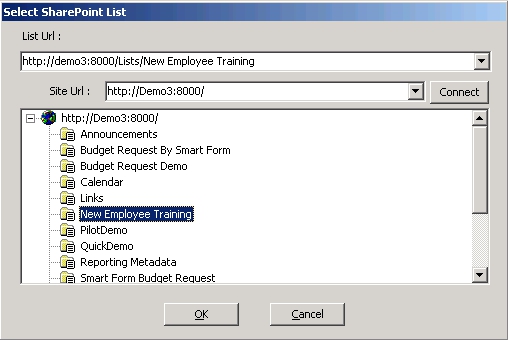
If you don't know the exact URL of the List, you can click the Search SharePoint Site link to select the List.
Type or select the SharePoint Site URL and click Connect. The directories available within that site appear.
File > Validate Process
This option validates the contents of a process template and can be used to detect certain types of common errors, such as incorrectly connected AgileShapes. After choosing this option, the validation dialog will be displayed.
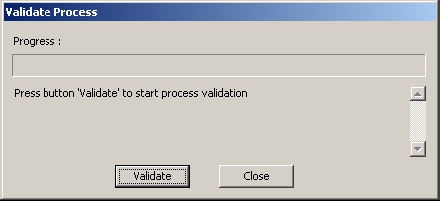
Click Validate to begin the validation process.
If the process template contains an error, a message will appear with information about the error and Envision will also show the source of the error highlighted in the process template so that you can correct it.

File > Update Server > Check out Process
This option allows you to connect to an AgilePoint Server directly from AgilePoint Envision, and then check out the currently opened process model. This prevents more than one user from updating the same process template at the same time.
If the process template has not been previously deployed to the AgilePoint Server, the command will fail.
File > Update Server > Create or Checkin, and Release Process
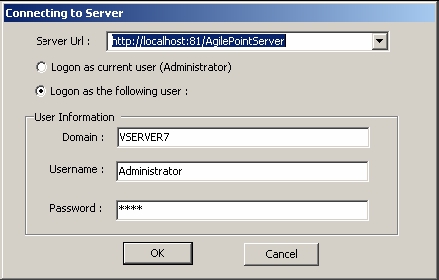
This option allows you to connect to an AgilePoint Server directly from AgilePoint Envision and deploy the currently opened process model to the AgilePoint Server. To successfully deploy a process template to an AgilePoint Server, the process template must be valid (i.e. no invalid AgileShape connections, etc.), and any custom AgilePoint modules (e.g. AgileParts, AgileWorks, AgileStubs, etc.) used in the process template must already be deployed to the AgilePoint Server. After selecting this option, the Connecting to Server window appears where you will first need to connect to an AgilePoint Server.
You will need to specify the URL location of the AgilePoint Server, and the Windows Authentication credentials that will be used to access the AgilePoint Server. The Logon as current user option will use your own Windows user account information to access the AgilePoint Server, or you can specify the Domain, Username, and Password of a different user account (e.g. you could use the credentials of the user account that the AgilePoint Server is configured to use as the System User).
After you have successfully connected to an AgilePoint Server, you may specify a version number, comment, and release schedule for the process model.
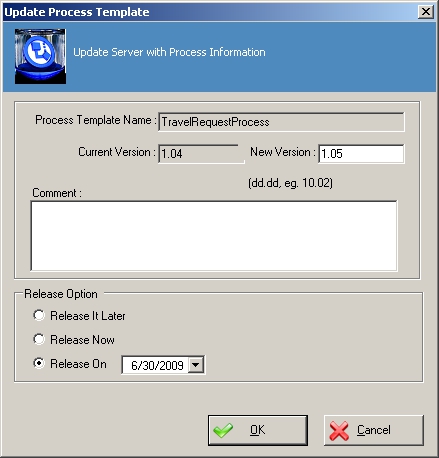
If you are deploying a Microsoft Info process template, you will see a dialog similar to the one below.
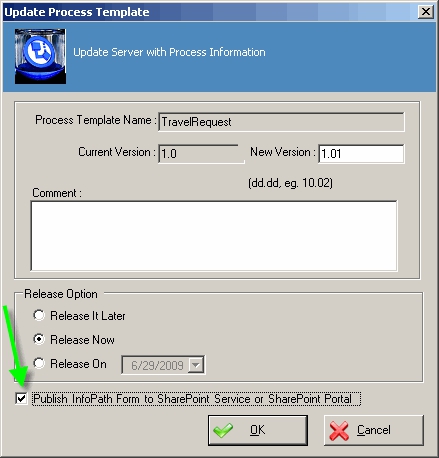
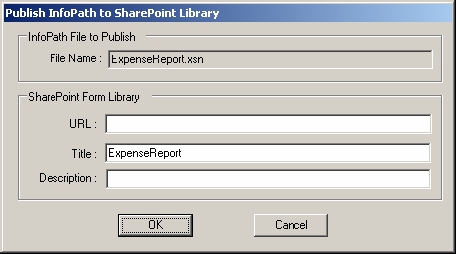
The check box at the bottom of the window allows you to publish the process template's associated InfoPath form (to Microsoft SharePoint) directly from AgilePoint Envision. If you check the check box, you will see a window similar to the one below:
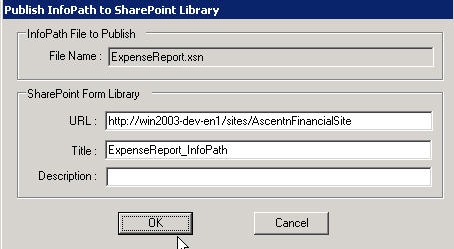
Enter the URL of the SharePoint site where you want this InfoPath form to be published and the Title for the Form Library name. Then click OK to publish the form to SharePoint. After clicking the final OK button (in either of the above windows), the process template will be validated. If validation succeeds, the process template will be deployed to the specified AgilePoint Server. If validation fails, the process template will not be deployed and you will need to fix any errors in the process template (and/or deploy any custom modules to the AgilePoint Server) before deploying the process template.
File > Export & Import > Save As Deploying File(xml)
This option converts your current process template to an XML file that can be used to deploy the process to an AgilePoint Server using AgilePoint Enterprise Manager (instead of using AgilePoint Envision). This method is most often used as an alternative in cases where AgilePoint Envision cannot connect to AgilePoint Server to deploy a process template. This method involves using AgilePoint Envision to convert your current process template to an XML file that can be deployed to AgilePoint Server using AgilePoint Enterprise Manager (instead of using AgilePoint Envision).
File > Export & Import > Convert To … > Generic
This option converts your current process model's underlying process template to a Generic process template. This option is not available when working with a process model based on the Generic process template.
File > Export & Import > Convert To … > SharePoint Document
This option converts your current process model's underlying process template to a Microsoft SPDoc process template. This option is not available when working with a process model based on the Microsoft SPDoc process template.
File > Export & Import > Convert To … > InfoPath
This option converts your current process model's underlying process template to a Microsoft InfoPath process template. This option is not available when working with a process model based on the Microsoft InfoPath process template.
File > Export & Import > Generate Report
This option allows you to create a HTML-formatted report for a process template. The generated report can be viewed in a Web browser. After activating this command, select the folder where you want to save the report and then click OK. The process definition and process diagram will be converted to HTM and GIF files, and saved to the selected folder.
File > Export & Import > Import Existing Visio file
This option creates a new AgilePoint Envision Generic process model based upon an existing Microsoft Visio diagram. The Visio shapes, connectors, etc. that are imported from the Visio diagram can then be converted into AgileShapes in order to create a working process model.
File > Export & Import > Import Process Template XML
This option allows for the Process Template XML to be imported from AgilePoint Enterprise Manager into AgilePoint Envision and saved as a .vsd file. This can be helpful if you have lost your master process template .vsd and want to recover it.
File > Process Simulation
This option allows you to run a simulation of how a process model will behave at runtime.
File > Extend AgilePoint > Register AgilePart
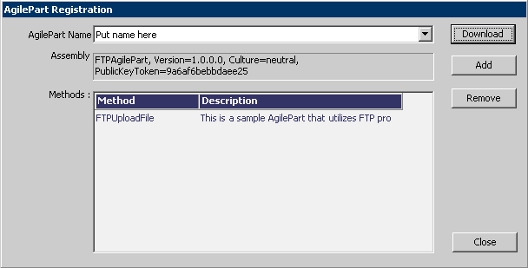
This option registers a custom AgilePart component with AgilePoint Envision. Custom AgilePart components must be registered before they can be used in a process template. After selecting this option, the AgilePart Registration window appears.
To download and register an AgilePart that has already deployed to AgilePoint Server:
- Click the Download button.
- Connect to the AgilePoint Server.
- Select an AgilePart that is
available on the server and click
OK.
If a previous version of the assembly was already loaded into memory by AgilePoint Server, any changes to the assembly would not take effect until after AgilePoint Server is restarted. Modifying any file in the bin directory will automatically cause IIS to restart AgilePoint Server.
However, modifying the assembly will not automatically cause a restart, so if you want any DLL changes to take effect immediately, you would need to restart IIS or the AgilePoint Server.
To register an AgilePart DLL that is located on your computer's file system:
- Click the Add button.
- Select the appropriate DLL
file and click
Open.
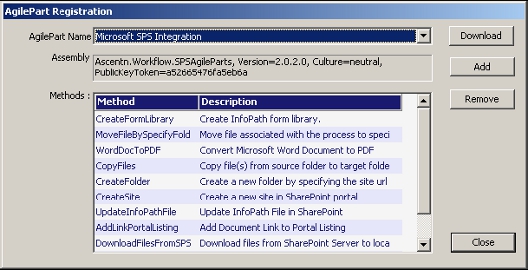
Once an AgilePart assembly has been registered, the AgilePart and its methods will be displayed in the AgilePart Registration window (as shown below) and they can be used in process templates.
File > Extend AgilePoint > Register AgileWork
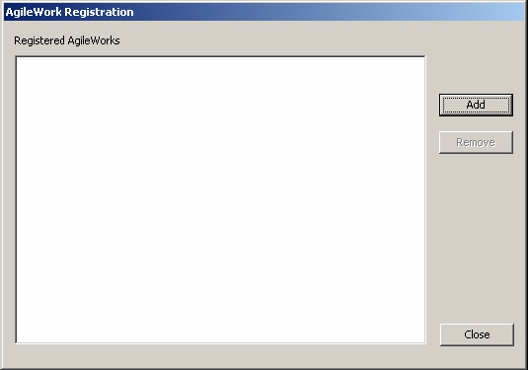
This command registers a custom AgileWork component with AgilePoint Envision. Custom AgileWork components must be registered before they can be used in a process template. After selecting this option, the registration dialog will be displayed (as shown below).
To register an AgileWork DLL that is located on your computer's file system:
- Click the Add button.
- Select the appropriate DLL
file and click
Open.
Once an AgileWork assembly has been registered, the AgileWork and its methods will be displayed in the AgileWork Registration window (see above) and they can be used in process templates.
Registering an AgileExtender in Envision
This command registers a custom AgileExtender component with AgilePoint Envision. Custom AgileExtender components must be registered before they can be used in a process template. After selecting this option, the registration dialog will be displayed.
- In Envision, click File > Extend AgilePoint > Register AgileExtender.
- On the AgileExtender Registration dialog box, click Add.
- Select the DLL file for the AgileExtender , and click Open.
Once an AgileExtender assembly has been registered, the AgileExtender and its methods will be displayed in the AgileExtender Registration dialog, and the methods can be used in process templates.
File > InfoPath > Publish InfoPath to SharePoint Library
This option is only available when working with a process model based on the Microsoft InfoPath process template. This command allows you to publish the InfoPath form associated with your process model to a Microsoft SharePoint Form Library directly from AgilePoint Envision.
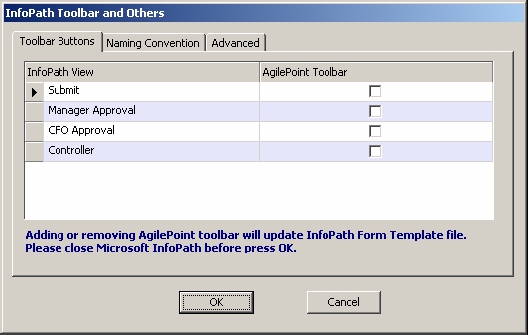
File > InfoPath > InfoPath Toolbar, Auto Naming and Others
This option is only available when working with a process model based on the Microsoft InfoPath process template. This option allows you to configure various InfoPath-specific properties of your process template. The Toolbar Buttons tab allows you to configure which views (in your InfoPath form) will display the AgilePoint Toolbar. The AgilePoint Toolbar displays the Submit and Close button when the InfoPath form is open.
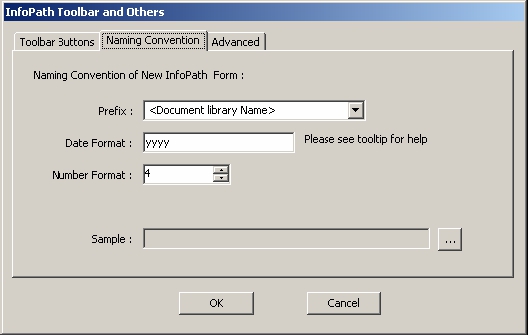
The Naming Convention tab allows you to configure how filenames are generated for new documents in the SharePoint Form Library associated with your process template's InfoPath form.
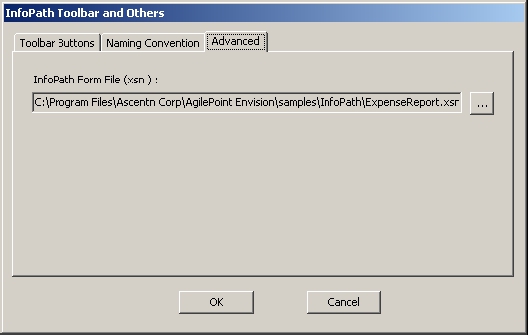
The Advanced tab allows you to associate your existing process template with a different InfoPath form.
File > SharePoint … > Change Document Library
This option is only available when working with a process model based on the Microsoft SPDoc process template. This option allows you to associate your existing process template with a different SharePoint Document Library.
File > SharePoint … > Retrieve Meta Data Schema
This option is only available when working with a process model based on the Microsoft SPDoc process template. This option allows you to retrieve information about the metadata columns of the SharePoint Document Library associated with the current process model. This option is most often used when you add a new metadata column to SharePoint and want to bind to it from an existing process template.
File > Shapes > Generic
This option displays the Generic Visio Stencil (i.e. Shapes window) containing the basic AgilePoint AgileShapes.
File > Shapes > Microsoft SPS
This option displays the Microsoft SPS Visio Stencil (i.e. Shapes window) containing the predefined AgilePoint AgileShapes related to Microsoft SharePoint functionality.
File > Shapes > Premier
This option displays the Premier Extension Visio Stencil (i.e. Shapes window) containing additional predefined AgilePoint AgileShapes. These AgileShapes are used for various purposes, including database access, database updates, Web service calls, etc.