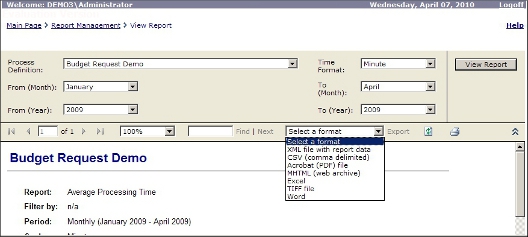
AgilePoint comes with a number of pre-configured sample reports. Once the AgilePoint SQL Server Reporting Services Integration and the sample reports are installed, you can access them from the Enterprise Manager Reports page. The sample reports include:
- Average Process Time by Automatic Activities
- Average Process Time by Automatic Activities - Monthly
- Average Process Time by Automatic Activities - Quarterly
- Average Process Time by Automatic Activities - Weekly
- Average Process Time by Manual Activities
- Average Process Time by Manual Activities - Monthly
- Average Process Time by Manual Activities - Quarterly
- Average Process Time by Manual Activities - Weekly
- Average Process Time by User Performance
- Average Process Time by User Performance - Monthly
- Average Process Time by User Performance - Quarterly
- Average Process Time by User Performance - Weekly
- Average Process Time by Versions
- Average Process Time by Versions - Monthly
- Average Process Time by Versions - Quarterly
- Average Process Time by Versions - Weekly
- Average Process Time Report - All Process
- Average Process Time Report - Monthly
- Average Process Time Report - Quarterly
- Average Process Time Report - Weekly
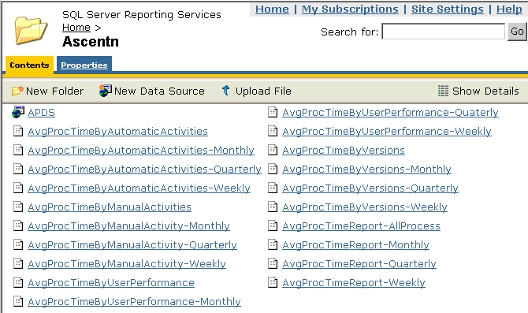
The AgilePoint sample reports are deployed to SQL Server Reporting Services during the installation. Open Microsoft SQL Server > Reporting Services > Report Manager and click the AgilePoint link. The sample reports are stored here, additional reports can be added as desired.
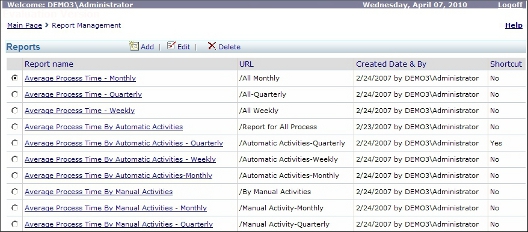
The AgilePoint sample reports are accessed from the Enterprise Manager Main Page by clicking the Configuration link in the Report Management section. The sample reports show on the Reports page. The Reports page allows you to add, edit, or delete a report.
To add a report to Enterprise Manager:
- Open SQL Server Reporting Services and click the AgilePoint link.
- Click Upload File.
- Browse and select the report file for which you want to add. The report file is added.
- Open Enterprise Manager and click the Configuration link. The Report Management window appears.
- Click Add. The Report Browser window appears. The Report Browser window displays all the reports that reside on the Report Server. From this window you can select a report from the Report Server to add in Enterprise Manager.
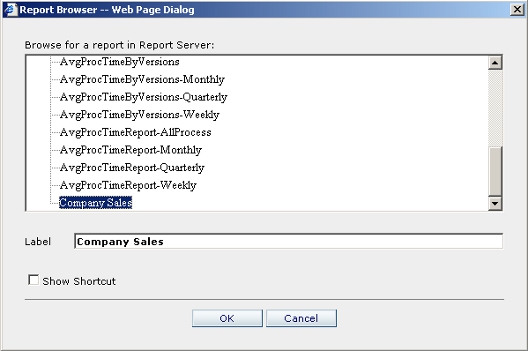
- Select the newly added report and in the Label field, type a name for the report.
Checking the Show Shortcut check box will display a shortcut link to the report on the AgilePoint Enterprise Manager Main Page. A maximum of three (3) report shortcuts can be displayed on the Enterprise Manager Main Page at a time.
- Click OK. The report is added. To edit a report in Enterprise Manager:
- From the Report Management page, click the option button next to the report for which you would like to edit and click Edit. The Report Browser window appears.
- Change the Label name and click OK. The report is now renamed to the new name.
To delete a report in Enterprise Manager:
- From the Report Management page, click the option button next to the report for which you would like to delete and click Delete. Click OK in the confirmation window. The report is deleted from the list.
To create a report:
- From the Report Management page, click the Average Process Time by Automatic Activities link. The View Report page appears. The View Report page requires some configuration parameters.
- In the Process Definition drop-down list, select ExpenseReport_InfoPath as the Process Template you want this report to run against.
- In the Time Format field, select Hour and click View Report to generate the report.
To export a report:
You can export the report into various formats such as HTML, CSV, XML.
- Click the Select a format drop-down list and select CSV (comma delimited).
- Click Export.
